Tuesday, December 7, 2010

Merry and bright


I found these chairs at DI (thrift) for 5 dollars each!
I love the rustic wood but I can't help thinking how awesome they would look painted a bright color.

The pillows actually aren't pillows at all. They are place mats bought at Tai Pan for 3 dollars each and I stuffed them. They match our tree skirt!

Mommy's stocking...


Daddy's stocking...


Baby's stocking...


Step one: I took a dollar store stocking that we used last year and traced around it on a double layer of felt.
Step two: I cut out around the trace leaving an extra half inch or so.
Step three: I pulled out all kinds of scrap fabric and trimming.
Step four: I added the trimming and sewed it on to one side of the stocking.
Step five: with the right sides of the fabric facing each other I sewed the stocking together.
Step six: I sewed the trimming on the top.
Step seven: I cut out a strip of felt with angles at the ends
Step eight:  I sewed a piece of red ribbon down the center.
Step nine: With angled ends touching I attached my loop to the inside seam of the stocking.
Hooray!
I was a little intimidated to start this project, I had high hopes and wasn't sure I could reach them.... I'm so glad I tried.  It really feels good to make something completely yourself.


Saturday, October 23, 2010

Wedding DIY: Fabric Flower Center Pieces


Jenna and Mike's amazing photographer Wendy Carter sent over these amazing pictures from the reception.
Find her Photography website HERE.
Find her Blog HERE right now she has a bunch of pictures from their wedding and they are all so amazing!

So here's how I made them...
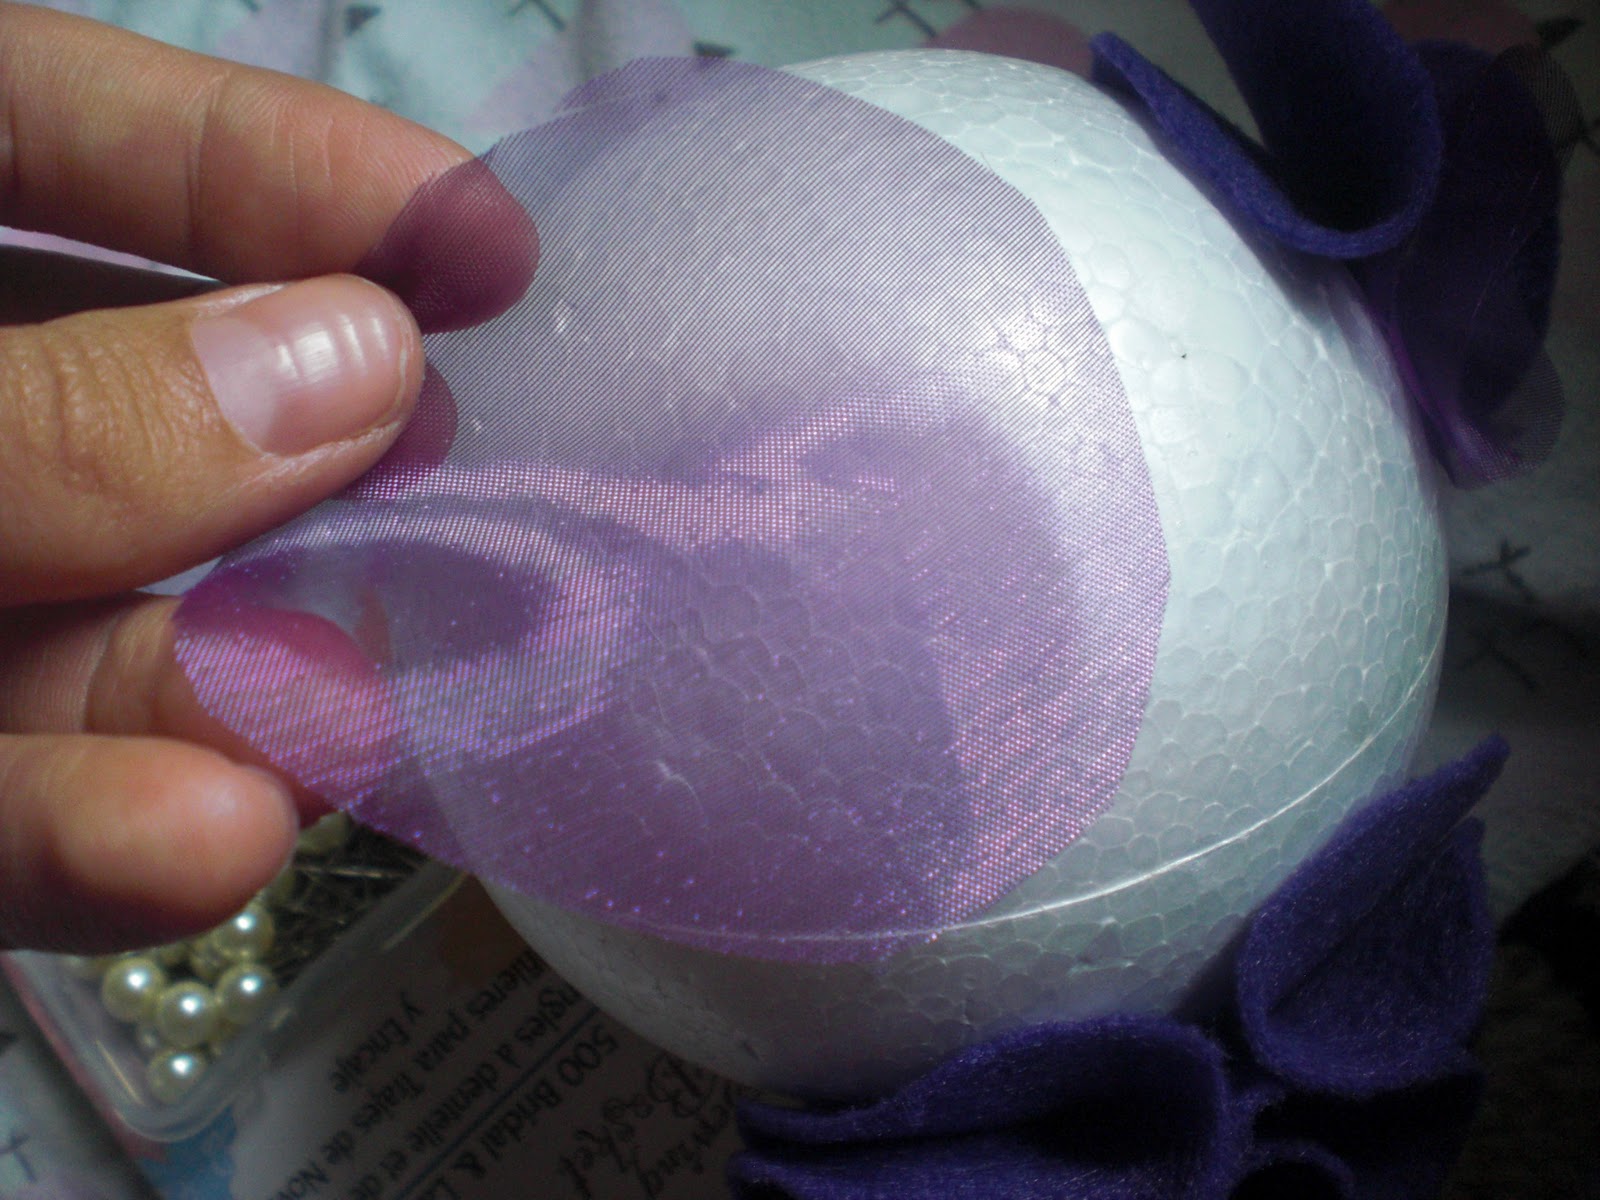
Cut out what feels like hundreds of  1.5 inch circles (They do not have to be perfectly round). 
 Purchase Styrofoam balls in various sizes.  Joanns was great and you can ALWAYS find coupons online as well.
Fold your circle in half.
Then fold in quarters.
Use strait pins to push the corner into the Styrofoam.
You can also push in circle halves to add variety.
Add some wedding bling by putting a pearl on the end of a strait pin.
Use a few different textured fabrics throughout.
So pretty.
Keep adding circles until ball is covered.
Most of these were placed in vases and we covered up to the point where  the vase covered the Styrofoam.  It was easier to leave the bottom clear.
To find more vases that matched Jenna's color scheme clear vases from the dollar store were spray painted.
We created 11 total fabric flower balls and it took a good half a day with 6 people helping. It is a bit time consuming but in place of real flowers well worth the time and money saved.

Sophie's Tip: There are two kinds of Styrofoam at the craft store. Buy the cheaper one! It is called "smooth" Styrofoam and it hold the strait pins SO much better!

Tuesday, October 12, 2010

Halloween decor ideas

My sister Selina has a house to decorate not just a door and walk way shared by four people like me, so she sent me over some pictures of her fun Halloween decorations!
She spray painted her vases gray and spray painted branches white.


This wreath is my FAVORITE! I love the purple.


 Such cool black branches. (I love her yellow door!)

Here's her girls hanging in the tree with their Ghosts!


Spooky!

Sophie's Tip: Just because holidays have traditional colors doesn't mean you have to use them to decorate. I Love Selina's color scheme! Great work sis!

Sunday, October 3, 2010

Blissful birthday


Supplies:
Tissue paper
Construction paper
Yarn
Clothes pins
Tape
Twist ties
Printer (for printing big letters if you don't want to write them out)
Stapler

Isn't Martha the BEST?

Pleated circle Tutorial:
1. Place your construction paper hot dog style.
2. Make 1 inch accordion folds through out the entire sheet.
3. Staple the middle of the fold and pull opposite sides up to create a fan looking shape.
4. Staple those sides.
(For each circle create 2 "fans")

I printed pictures of Eden from birth to present (Maceys .10 4x6 every Wednesday!) and hung them from yarn with clothes pins (2.00 from Walmart).  I also hung them from the window by the table.


We borrowed this play tent from a friend and it was such a big hit. The kids LOVED it!
I filled baby food jars with jello for a treat!

I used some sweet trimming to make a plate holder a bit more fancy... I think I will use it to make a pillow now that the party is over.


Sophie's Tip: Birthday parties don't have to be expensive to be fabulous.  Look around your house and see what you've got, a little construction paper can go a long way!

Thursday, September 23, 2010

Vintage Scarf Pillow

As you all know I LOVE thirfting.
When ever I shop I always find these really awesome vintage silk scarfs.  I buy them thinking I will totally be able to style them... but nooo, unfortunately they hang on my scarf rack untouched.
The patterns on the scarfs are just so cute and I was sitting there thinking one day This would make the cutest pillow!


Such a fun scarf!

First I measured my pillow (A thrifted tan blah pillow) 18 x 18 then I cut out a large piece of felt 19 x 19 to add a half inch of room on each side.

I pinned it to the scarf and did my best to line up the sides.
Next I ran it through the sewing machine leaving space open to stuff my pillow.

My new FAVORITE pillow!!! I seriously adore it.

Sophie's Tip: Leave a big enough hole on the side to stuff your pillow once you are done sewing like, leave almost one whole side open.  I didn't leave a very big hole so I ended up ripping some of my scarf... Don't worry though, I fixed it :)