Tuesday, October 12, 2010

Halloween decor ideas

My sister Selina has a house to decorate not just a door and walk way shared by four people like me, so she sent me over some pictures of her fun Halloween decorations!
She spray painted her vases gray and spray painted branches white.


This wreath is my FAVORITE! I love the purple.


 Such cool black branches. (I love her yellow door!)

Here's her girls hanging in the tree with their Ghosts!


Spooky!

Sophie's Tip: Just because holidays have traditional colors doesn't mean you have to use them to decorate. I Love Selina's color scheme! Great work sis!

Sunday, October 3, 2010

Blissful birthday


Supplies:
Tissue paper
Construction paper
Yarn
Clothes pins
Tape
Twist ties
Printer (for printing big letters if you don't want to write them out)
Stapler

Isn't Martha the BEST?

Pleated circle Tutorial:
1. Place your construction paper hot dog style.
2. Make 1 inch accordion folds through out the entire sheet.
3. Staple the middle of the fold and pull opposite sides up to create a fan looking shape.
4. Staple those sides.
(For each circle create 2 "fans")

I printed pictures of Eden from birth to present (Maceys .10 4x6 every Wednesday!) and hung them from yarn with clothes pins (2.00 from Walmart).  I also hung them from the window by the table.


We borrowed this play tent from a friend and it was such a big hit. The kids LOVED it!
I filled baby food jars with jello for a treat!

I used some sweet trimming to make a plate holder a bit more fancy... I think I will use it to make a pillow now that the party is over.


Sophie's Tip: Birthday parties don't have to be expensive to be fabulous.  Look around your house and see what you've got, a little construction paper can go a long way!

Thursday, September 23, 2010

Vintage Scarf Pillow

As you all know I LOVE thirfting.
When ever I shop I always find these really awesome vintage silk scarfs.  I buy them thinking I will totally be able to style them... but nooo, unfortunately they hang on my scarf rack untouched.
The patterns on the scarfs are just so cute and I was sitting there thinking one day This would make the cutest pillow!


Such a fun scarf!

First I measured my pillow (A thrifted tan blah pillow) 18 x 18 then I cut out a large piece of felt 19 x 19 to add a half inch of room on each side.

I pinned it to the scarf and did my best to line up the sides.
Next I ran it through the sewing machine leaving space open to stuff my pillow.

My new FAVORITE pillow!!! I seriously adore it.

Sophie's Tip: Leave a big enough hole on the side to stuff your pillow once you are done sewing like, leave almost one whole side open.  I didn't leave a very big hole so I ended up ripping some of my scarf... Don't worry though, I fixed it :)

Friday, June 11, 2010

DIY: Earing Frame Fabulousness

Everyone needs this on their dresser!

1. Start out with a regular frame with out the glass in it. Mine was meant to hold an 8*10 picture but an even BIGGER frame would be even more fantastic.
2. Measure the frame across and cut out three strips of lace. I needed less than a yard of lace for this frame size.
3. Using the frame backing as your guide cut out fabric leaving it an extra inch bigger all the way around. Pin your strips across the fabric. Space them according to your frame size.
4. Sew or hot glue your lace down.
5. Line up your fabric on the frame backing and flip it over.
6. Hot glue the fabric around the edges.
7. Next I painted the frame with a color called "raspberry wine" then I had the song "Strawberry Wine" stuck in my head for the rest of the day.
8. Put the frame backing in the frame and TA DA! Done.

I'm constantly looking for ways to be more organized with the mess of stuff I have on my dresser so this little creation should help a lot!
PS- After I was done I thought  How cute would it be if I put some quilt backing under the grey fabric to give it a "cusiony" look... To late for me, but you might want to give it a try.
PSS- Um, I am kind of known in my family for my incredibly terrible spelling... so feel free to laugh at the fact that I was utterly shocked to find that there is a "P" in raspberry ... I feel like the rug was pulled out from under me!

Thank goodness for spell check!
XOXO~ Sophie

Friday, June 4, 2010

DIY: Spray Paint Vases


These were all just plain clear vases that i have collected over the years... they basically just take up room in my cupboards... so i sprayed them stylish!


Give it 2 coats and 30 mins to dry...


So pretty!

Sophies Tip:  Make sure that you sand the glass just a pinch so the paint sticks!

Thursday, June 3, 2010

Make a Onsie more FUN: Part 1

I love how easy a Onsie is to throw on, especially in warm weather! They are just so plain though, it makes me feel like my baby is still in her PJ's.
Solution: A felt applique of course!!

Step 1: Cut out a pattern/Shape/number/letter.
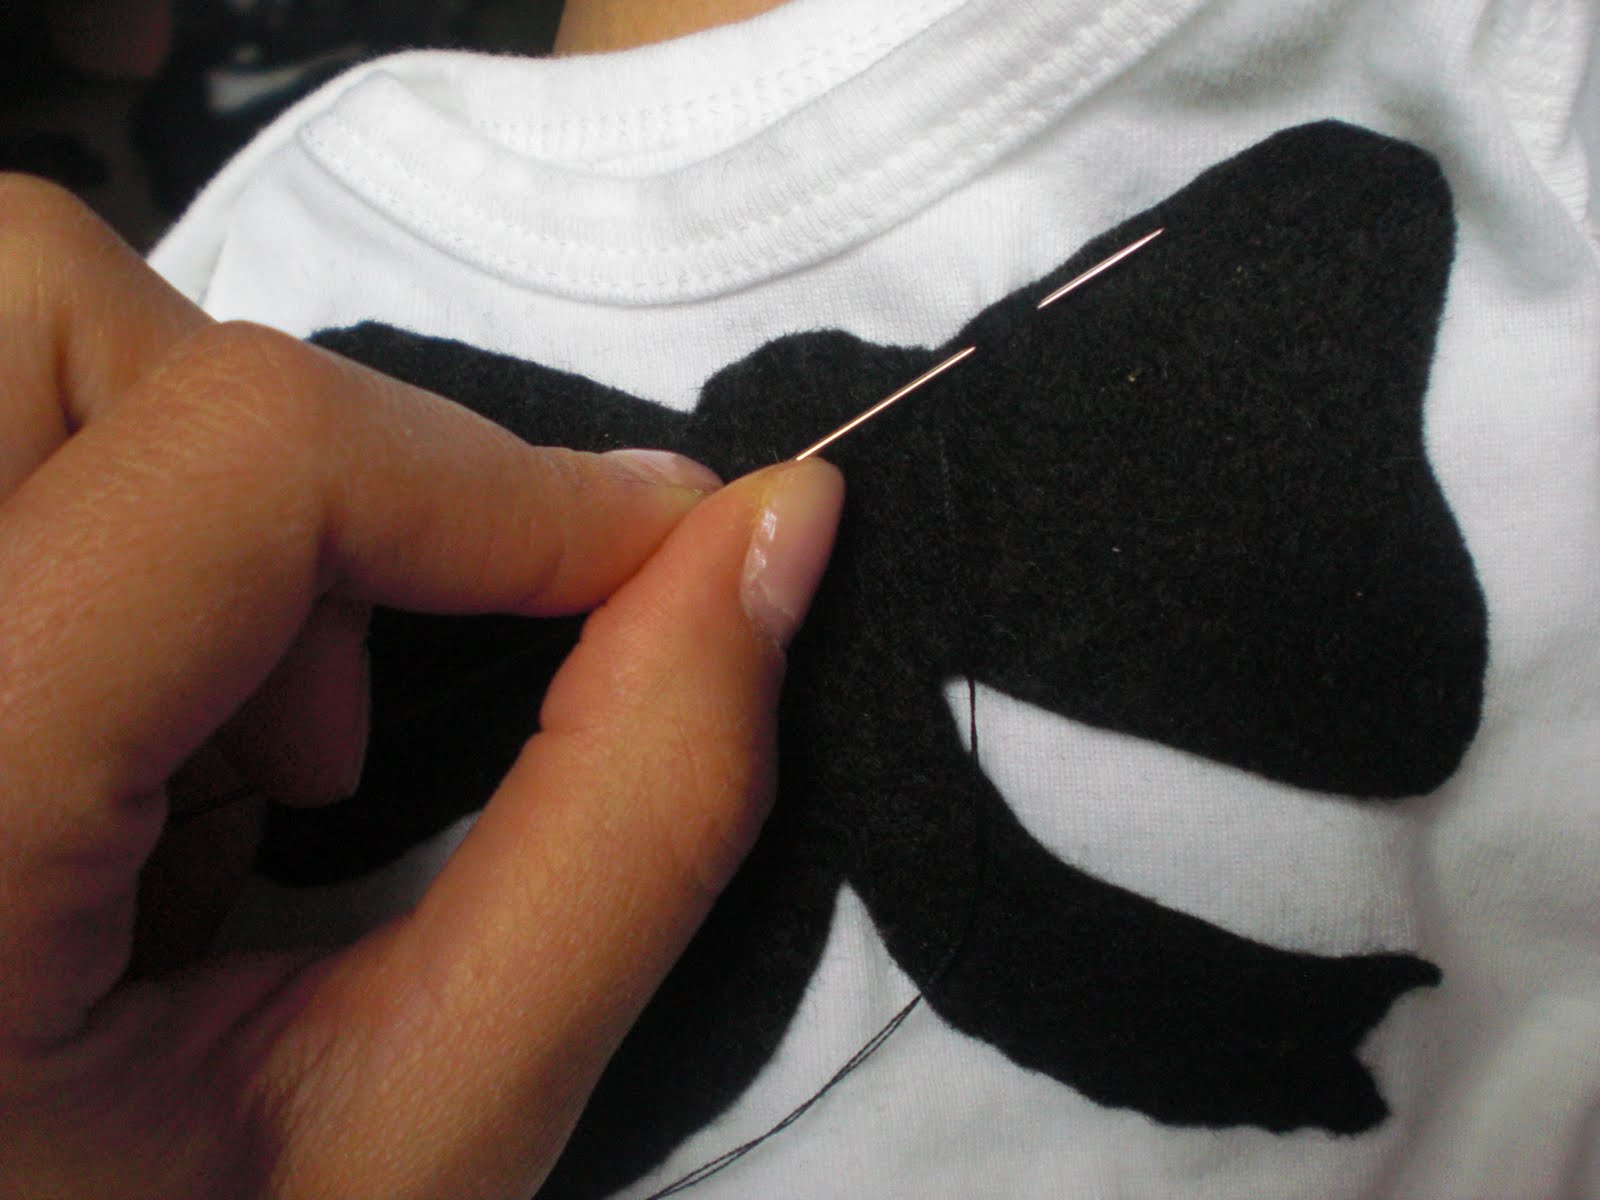
Step 2: Using fabric glue, attach the applique out to the Onsie.
Step 3: With a needle and thread do a basic stitch around the outer rim of your applique.

All done!
 I made this shirt the same way for my daughter to cheer on her Daddy.
The GREAT news is I have washed this shirt about 20 times (In the washing machine and dryer!) and it still looks great:)

DIY: Cardigan

This project from start to finish took 30 minutes!

1. Cut out one inch strips of fabric. (Smaller or larger depending on how big you want your flowers.)

2. Cut a (fairly even) square out of your strip. This makes it easier to make sure your flowers are all the same length. TIP- Be sure to use fabric that won't fray!!!

3.With the corners as your guide cute out four petal flowers. I cut out between 34 and 36 flowers.

4. Now find the cardigan you want to use. I would lay out the petals in the arrangement you want so you like how it looks and so you are sure you have enough.

5. With thread similar to the color of your flowers stitch them on. (I used 2-3 larger stitches per flower.)
SEEEEE so easy!

Thursday, May 27, 2010

My first blog Award!!

Its always nice to be noticed... :)
Thank you Brittney Allen with Brittney's Budget Crafts.
 I love being able to share my ideas on this blog!

Rules of receiving this award:


1. Thank the person who gave you this award: BRITTNEY:)

2. Share 7 things about yourself.
a. When I am having a really bad day my husband sends me to go shoe shopping.
b. My favorite song is Dave Matthews Band, #41.  It is sad and happy to me at the same time, which I love.
c. I want to be a singer. I just about pee my pants with fright singing in church but I still want to do it.
d. I want to be a photographer. I want to get a fabulous camera and take free (and amazing) pictures for my family and friends.
e. I still have 5 baby teeth to loose... and I am almost 26 years old. (I've always been a late bloomer.)
f. I love to dance.  I hear music and I make up dances in my head.
g. I have another craft" blog... sisters4saymoreismore.blogspot.com with my amazing sisters.

3. Pass the award along to 9 bloggers who you have recently discovered and who you think are fantastic! (in no particular order...)
The Bright Side -The most upbeat happy blog I have ever read.
Bladh Photography -Creative photography.
Memoirs of a Receptionist -This girl is Hillarious, I die laughing at her stories.
Grosgrain -Creative and crafty projects.
MADE -Great photography and to die for ideas!
The Selfish Seamstress -Amazing sewing projects and such a funny writer:)
~Ruffles and Stuff~ -Original repurposing and DIY projects that anyone can do.
Little Red Roost -Great style and cute projects.
Freshly Picked -She has tutorials for fun clothes.

4. Contact the bloggers you've picked and let them know about the award.

Monday, May 24, 2010

Two ideas into ONE=Table setting for a fabulous WEDDING


This turned out so cute that I had to share!!
If you take this tutorial and add it to this tutorial the result will be oh so darling.
Andrea (the bride) and I walked around fields near her nieghborhood with large saws in our hands looking for stray branches to use. Her kind fiance followed us with a giant cardboard box to carry all of our findings in, the sweetheart.
Women in her Ward (church group) got together and made all the paper cranes. Her Mom got a paper puch out of a flower and hand punched most of the blossoms then we hot glued them on the braches.
The paper cranes are hanging on Christmas ornament hooks and the frames were modge podged with coordinating scrapbook paper onto frames from the dollar store.
The vases were filled with rocks found at the dollar store and one bag filled two vases.
SO GENIOUS!
I also loved the chinese laterns hanging everywhere. SO fun and so fabulous.
xoxo~SOPHIE