Monday, May 7, 2012

be okay

These photo's were taken with my phone, please forgive the crappy quality. This was a 30 minute project top to bottom.
I was inspired by this:
I found it on Pinterest but it is from the etsy shop HERE.

First I cut my burlap and left a one inch flap in the back

Then I used my stencils and black paint to add my words.

It took about 15 minutes to dry.

Next I stitched around the edges to prevent fraying and to enclose a space for the dowel to go through.
Now just throw in a dowel and add some string.
All done & so easy!
~Soph

Friday, December 9, 2011

Christmas banner


Supplies:
Card board triangle cut out~ For pattern
Scrap fabric
Red double sided bias tape


I cut 26 triangles total and it made a banner 13 triangles long.... 13 is random but I never counted... or measured really. 

I sewed the triangles together and turned them inside out, leaving the tops open. 
Lastly I used the bias tape to sew them all together.


I seriously did this project in August. 

No lie.


I was a little excited for Christmas.

xo~Sophie

Tuesday, October 4, 2011

Halloween Banner Tutorial


I was inspired by this lovely little etsy shop.
First I cut a triangle out of cardboard to use as my template then cut many triangles out of burlap.  I bought a yard... MORE than enough!  Next I used acrylic paint and stencils (Hobby Lobby is where I found the stencils and they always have great coupons online) to write "Happy Halloween" leaving one triangle blank for the space between both words.


I used bias tape to attach all the triangles. 
 I used the double sided bias tape and it made it very simple to put together.

 I used the back of my sponge brush to make the polka dots.

Not gonna lie guys, I went a little crazy with the banners...


 Sophie's Tip: Burlap tends to be messy and fray. I took each triangle and lined the sides with a line of hot glue (Except across the top where you will attach the bias tape).

Thursday, September 15, 2011

fall wreath from a lovely guest

Hello everyone, I have a very creative friend who is going to show us how she made this fabulous wreath. Meet Meriel:


So lately, I've been all about Pinterest. It's been my fave go-to app for any inspiration I need, be it craft, food, or design. I seriously love seeing what other people find out there on the internet! (It saves me sooo much time web-surfing!)

For my daughter's birthday I had all this gold tulle laying around from a table skirt I had put together and I wanted to reuse it in a cool way. In walks Pinterest and a wreath that many people have pinned as a to-do fall wreath. On top of reusing the tulle, I also wanted to try another Pinterest pin I had seen popping up where people use plumbing tubes as their wreath bases instead of paying exorbitant amounts at craft stores for foam wreath circles. Genius because it costs less than a dollar for 6 feet and if you have a handy husband like mine, he already had some in the garage. Sweet.

So here's my tutorial because it was super easy and very encouraging for a first time 'wreather' like myself, I figured others would want to know too!

First - the inspiration.


Second - the how-to instructions. (If you click on the pics, you'll be able to see everything closer up for more detail.)

1. You need foam piping, strong tape of some sort (duct, or electrical is what I used), and scissors. Cut the length of piping to your desired length/circular circumference. Mine was 24 inches laying flat, then taped into a circle. (FYI - my circle was a little small and the foam wasn't holding it's shape perfectly well, so my husband helped me cut some hanger wire and stick it inside to help shape it better. I'm assuming with a bigger circle this would not be an issue.)
2. You will also need a lot of tulle. Funny how I started this project with no idea if I would have enough tulle or not...
3. I knew that my gold tulle wouldn't hide the black/grey piping beneath it, so I covered it with strips of white muslin first.
4. I cut my tulle into strips that were about 11-12 inches long and used two strips at a time to give it more depth.


5. Then, with the circle in between my legs (sweet cut-offs, meems) I took the two-at-a-time strips and tied a half knot around the circle with the edges out. Don't finish the knot because it creates ugly space between the tulle ends and the wreath itself. The strips aren't going anywhere, so you're good with just the half knot.
6. Pull it tight and close to the previous knot so there's no space on the side of the wreath either.
7. See? Everything is really close together so you can't see the white underneath, and the tulle is just bulging outwards nice and pretty.
8. Keep repeating all the way around the wreath with your strips. Just to gauge, I used 80 strips (of two per knot) for the entire circle. And that's a small circle, so I'd make sure you have enough tulle before you start.
9. I trimmed the edges a little to make sure it was pretty even around the whole circle, and then hung with ribbon! Can you believe how lucky I was that I literally used my last two strips to finish it? Nothing left over, the perfect amount without knowing to start with... I was totally tempting fate, but I came out victorious.


Lastly - the final product. (With the flash it makes the tulle look really gold!)


Yay! My first wreath. It was really fun and I daresay, really addicting. Especially because I didn't have to buy an $8 foam base at Joanns. Well, hope you like it! You won't see it at my house unless you are invited inside though. I thought it looked cuter inside that on a door facing the street. So this is in my kitchen away from the elements and close up for me to smile at all day.

~Meriel


Thanks for sharing your creativity with us!!! I can't wait to make this myself:)
xoxo~
Sophie

Tuesday, September 6, 2011

Christmas advent calendar tutorial

Call it nesting but... I started working on Christmas projects in JULY!!! My baby is due in the beginning of November and I thought it was important to get a head start on all things holiday.  I know how much of a zombie I am those first few months and I didn't want Christmas/Holiday traditions be the thing that was just accidentally forgotten.
So here it is my version of this. You can probably tell by my handy work that I am not an expert seamstress.  I just go for it and most of the time don't even measure.
But I did keep track of what I was doing so if any of you lovely's wanted to recreate it you could.

Start with:
Background fabric~ 18.5 inches by 30 inches
Tree~ 16 inches by 14 inches 
Three strips of fabric~ 18.5 inches by 6.5


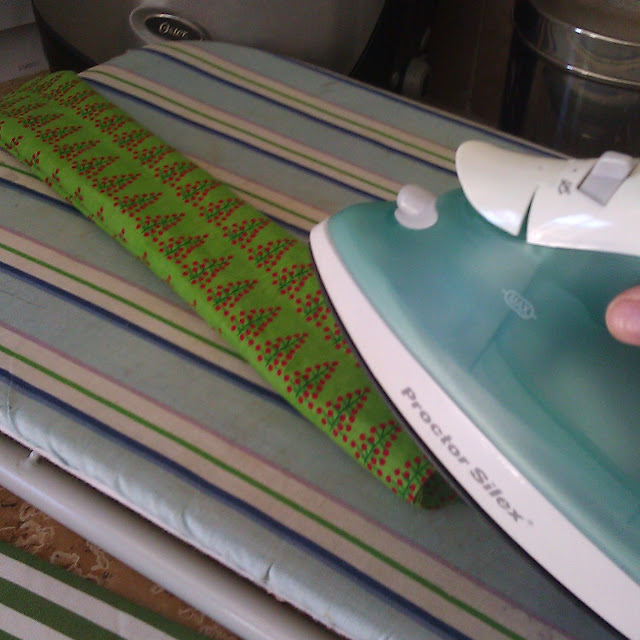
Once you cut out your strips fold them in half (hot dog style) with right sides touching and iron the edge.

Using a regular straight stitch sew the open ends closed.

Flip the tube of fabric inside out and iron again.

Pin them to the bottom of your background fabric.

Next I used a zig zag stitch to attach my tree and I added a little tree stump.

I really liked having striped fabric because it made creating the pockets much easier (especially for a girl who doesn't measure).   You will probably want to use a ruler to break up your pockets each of mine are 2 and 1/8th of an inch with more space on the side pockets for a seam allowance.
First I sewed across the bottom of all three strips. Next I sewed down in single lines that went through all three strips.

I chose purple felt for my backing because it was all that I had. I cut it to match my background materiel exactly. Now, with right sides facing, pin edges of both these pieces of fabric together so you can sew around the edges. I added giant rick rack for fun. Make sure to leave a few inches so you can turn your fabric right side in. Lastly, hand stitch the last few inches together. 

Now you can hand sew on your bells. 24 of course!

I bought gold paint and small number stencils and painted on numbers 1-24.

 Putting the dowel in the back was trial and error for me. First I made a loop that the dowel could slide into but then the calendar hung forward so finally I just cut right into the top like this:
 and attached large red grosgrain ribbon to either side.

Finally you will need to purchase 24 small ornaments. I had no trouble finding them at Hobby Lobby. Hobby Lobby also always has coupons for 40% off so I got all of my ornaments for 5 dollars. I painted fabric gold and cut it out for a star and I hot glued on some small red rick rack for my tree. 
I used all scrap fabric so I really only bought the trimmings. 

Bells~1.27
Small rick rack~ 1.00
Large rick rack~1.50
Ornaments~5.00
Paint~1.36
Dowel~.67
Total cost: 11.00
(I used all my own fabric scraps so I didn't need to buy any.)

Events for days 1-24:
Thursday December 1st: Put our gift to Jesus under the tree (whenever we are serving or doing something kind we write it down and it goes in our gift to Jesus that stays under the tree all month)
Friday December 2nd: Listen to Christmas music
Saturday December 3rd: Go visit Temple Square
Sunday December 4th: Make hot chocolate and stir with candy canes 
Monday December 5th: Make a gift for Grandparents
Tuesday December 6th: Make the house smell like Christmas 
Wednesday December 7th: Read a Christmas Story Book 
Thursday December 8th: Wrap Christmas Gifts for Grandparents
Friday December 9th: Make a new Christmas Decoration 
Saturday December 10th: Color a Christmas picture 
Sunday December 11th: Watch a Christmas movie and eat popcorn
Monday December 12th: Elf some people in your neighborhood 
Tuesday December 13th: Build a snowman or hang up paper snowflakes 
Wednesday December 14th: Go out for a Christmas treat 
Thursday December 15th: Do something nice for someone 
Friday December 16th: Drive around and look for Christmas lights 
Saturday December 17th: Do service for someone in need 
Sunday December 18th: Make and decorate cookies 
Monday December 19th: Call a loved one
Tuesday December 20th: Go caroling and drop off treats to neighbors/friends 
Wednesday December 21st: Read a story or watch a movie about the birth of Baby Jesus 
Thursday December 22nd: Write letters for Santa Clause 
Friday December 23rd: Read "The Night Before Christmas"
Saturday December 24th: Act out the Nativity


Well, there you go! Is anyone else out there crazy like me and creating holiday decorations before summer is even over?

xoxo~Sophie

Thursday, June 2, 2011

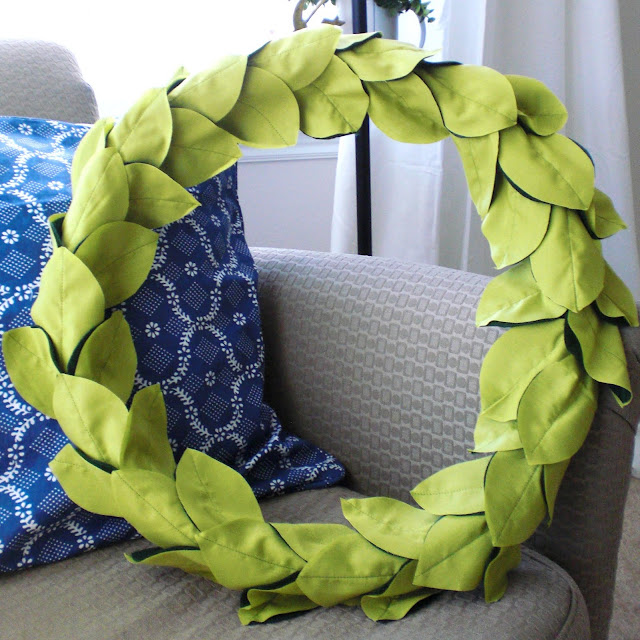
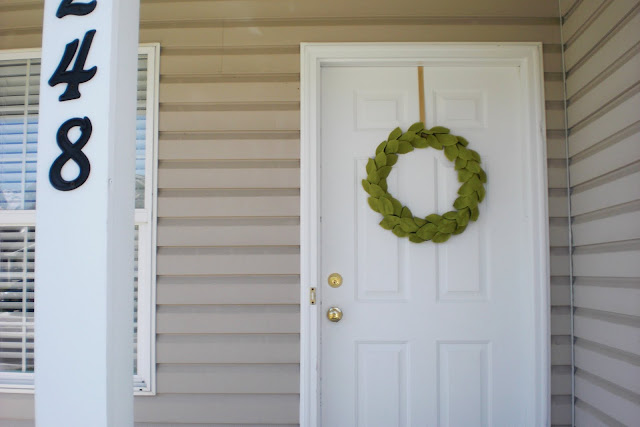
Spring green wreath


 This project is really simple all you need is
Glue gun
Sewing machine (or you can hand stitch)
Green thread
Green fabric 1/2 yard
Green felt 1/2 yard
Wreath 


I got my spring green fabric from the sale fabric section at Walmart (1.50 a yard)
You can also find felt almost anywhere for a good price as well.
My thread was 2.00 and I got the wreath from Dollar Tree (I was surprised how big it was).


Total cost:
5 dollars


1) The most time consuming part of this project is the cutting.
I cut 36 leaves out of felt and 36 leaves out of regular fabric. The leaves are 4 inches by 2 and a half inches. 


2) Sew a straight line down each of your leaves attaching the a felt leaf with a fabric leaf.


3) Using your hot glue gun attach the leaves felt side down to your wreath. I glued in clusters of three. First I glued two leaves on the sides then one in the middle and continued in that pattern all the way around.


Easy... CHECK 
Thrifty... CHECK

~Sophie

Sophie's Tip: If you can't find a wreath at the dollar store then check for an old wreath at a thrift store that could use a make over OR just head over to JoAnns or Hobby Lobby with one of their ever present 50% off coupons!

Monday, May 2, 2011

my "new" old mirror

This mirror was 3.00 at DI
but a very unfortunate cream yellow color.
It looked old and dusty...

A good cleaning and a 3.00 can of grey spray paint later and it's my new favorite wall hanging.


Sophie's Tip: Spray paint rocks! the end.

Thursday, February 24, 2011

domestic love pillows

"domestic love pillows" is what our husbands called the project we spent all day yesterday working on:
(The letters are not sewn on yet.)


Sophie and Amy

We made the entire pillow from scatch, we even hand picked the cotton stuffing....
ok that's a lie...

but the rest of it we made!

Amy was inspired by this esty shop full of fabulous things but a little out of our ideal price range. This project cost less than ten dollars!

Sophie's Tip: Adding felt aplique to a pillow is easy. I suggest two ways:
1. Sewing the felt on with a machine using the zig zag stitch. The stitch moves slower than a strait stitch and is forgiving if you make mistakes.
2: Glue your felt on with Fabri Tac, let it dry over night then hand stitch around your letters.
             

Tuesday, January 11, 2011

Eden's room round 2

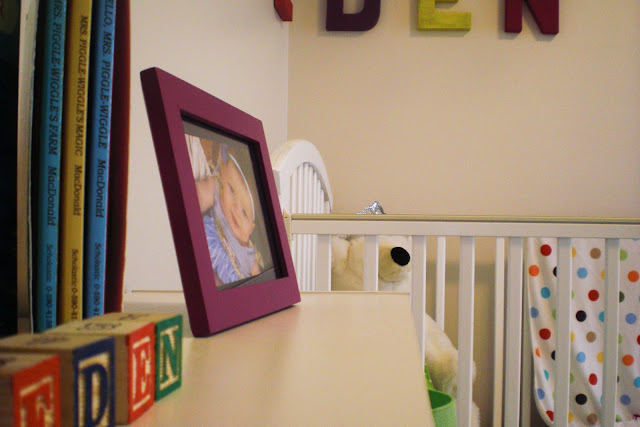
Eden's room is so fun. I love decorating it because everything in it is bright and cheery. I had the idea to do this over the crib pom pom party thing in our last place but didn't know how to put it all together. I found 3M hooks that won't leave holes in my ceiling so I was all set to finish my idea in our new house. I just reworked the Chinese lanterns with the big colorful tissue pom poms we made for Eden's birthday party.
The block letters were 2 dollars each from Joanns and I painted them the colors I wanted. (Click on my nursery posts to see where I got inspired for this cute off centered idea:)


I found these wooden blocks for 2.50 in Target's dollar section!

Click HERE to see the original room.

It is fun to start over and try to recreate a space. I am still not quite finished with the shelves on the other side of the room but pictures will come soon.

This room is all budget friendly. I mean really budget friendly... just proof again that you don't need to spend a lot of money to create a fun space.